Have you ever wondered, how does iPad cellular work and how it's different from the Wi-Fi only models? Well, this article will cover everything you need to know about the iPad cellular variants and we will find out if you should buy one or not.
iPads these days come in two variants, one that allows you to roam free with an eSim/Sim and a second variant that's equipped only with Wi-Fi capabilities, which means that you need a stable Wi-Fi network for you to connect to the web.
Choosing the cellular variant has its advantages over the Wi-Fi only model and as you read through, I will guide you through the steps you must follow to setup and use the iPad WiFi + Cellular. I'll even take you through how it works and list out the advantages of using an iPad with cellular capabilities.
Let’s begin!
Recommended Read: How To Contact Apple UK
How Does iPad Cellular Work?
Like the name suggests, iPad’s with cellular capabilities are those that let you stay connected to the internet even when there’s no Wi-Fi nearby.
For this to work, you will have to either have an active Sim card or opt for an eSim with a valid data plan. The iPad will then connect to the internet when you’re on the move and you wouldn't have to rely only on Wi-Fi hubs to stay online.
With the cellular variant, you’re able to send iMessages, use IM’s such as WhatsApp, Viber, Skype, FaceTime and more. But, what you can’t do is make cellular phone calls or send standard text messages.
Let’s take a look at how set up and use cellular data on the iPad.
Does an iPad with cellular need a SIM card?
Yes, an iPad with cellular connectivity requires a SIM card to access cellular data. The SIM card allows the iPad to connect to a cellular network and access the internet when Wi-Fi is not available. When you purchase an iPad with cellular connectivity, you will need to insert a compatible SIM card from your carrier to activate the cellular service.
Some carriers may offer eSIMs, which are digital SIMs that can be activated without a physical card. However, not all carriers support eSIMs, so you may need to check with your carrier to see if this option is available.
Recommended Read: Best iPad Magic Keyboards Alternatives
How To Set Up and Use Cellular Data Service on an iPad?
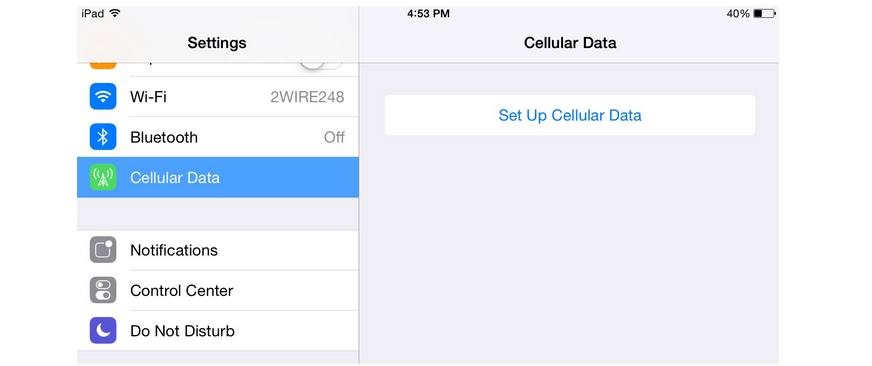
If you’re the proud owner of the Wi-Fi + cellular variant of the iPad then the first thing you will need to do is to sign up for a cellular data plan.
There are two ways you can set up data services on your cellular iPad.
- Use an Apple Sim Card - iPad with cellular capabilities come with a dedicated Sim card slot. All you’d have to do is activate a sim card and insert it into the Sim card tray. Once you have a valid sim card, you will be able to remain connected to your social applications and surf the web even if the iPad is not connected to Wi-Fi.
- Use an eSim - Some iPads come with a built-in chip that acts as an eSim. You wouldn’t require any physical Sim card for it to connect to the internet. Instead, you will have to set up a data plan directly on your iPad by either scanning a QR code or by logging into the network providers app on your iPad.
Here are some of the important settings to follow if you’re setting up a data plan on your iPad for the first time.
Set up a Data Plan on your iPad using the Settings App
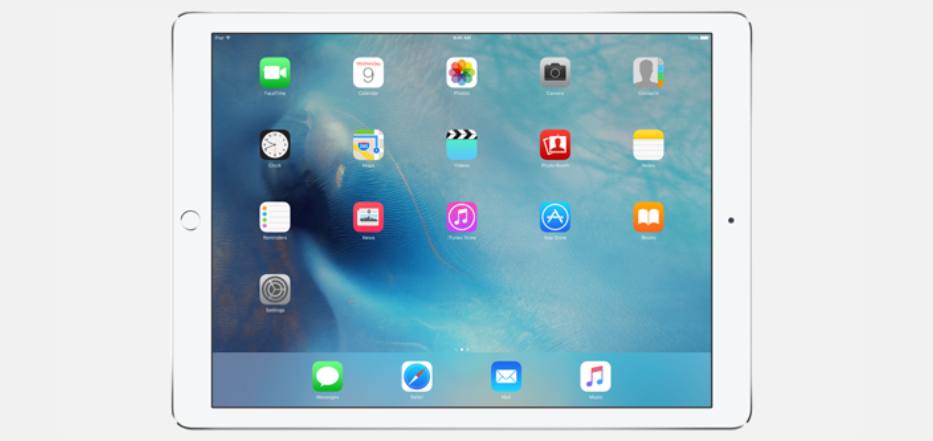
- Start by unlocking your iPad and open the Settings app.
- From here, navigate to Cellular data and then tap on Set up cellular data.
- Proceed to choose the right carrier (preferably one that you currently use)
- If you are unable to view your carrier, you will have to contact them directly to have either your Sim card or eSim activated.
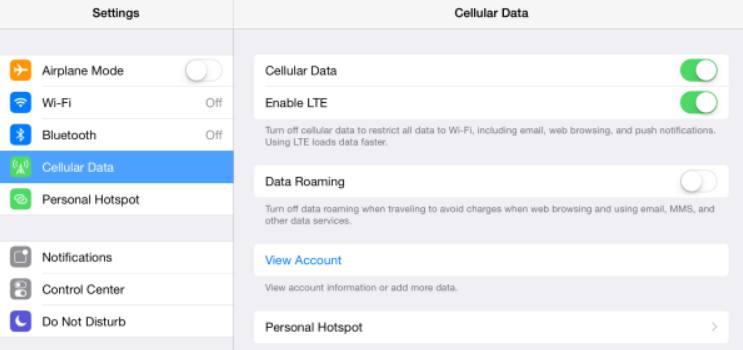
- If you can see your carrier’s name on the iPad, select the carrier and then choose a new data plan and create an account. You can even select an existing data plan that you may be using on another device.
- Once done, tap on confirm to save the settings.
All-in-all, this process should take a couple of minutes and your Sim card will be ready to use in under 15 minutes.
Set up a Data Plan on your iPad by Scanning a QR code

To make it easier, carriers let you activate your iPad data plan by simply scanning a QR code they provide. For this to work, you will have to
- Unlock your iPad and open the Settings app.
- Now, tap on Cellular data and proceed to add a new cellular plan.
- You will be asked to scan the QR code using your iPad.
- Once done, you may be presented with a pop-up requesting you to enter a confirmation code to activate your new eSim. Proceed to enter the code provided by your carrier and you’re good to go.
Set up a Data Plan on your iPad with the Network Providers App

One of the easiest ways to activate cellular capabilities on your iPad is by using the network carriers official application. You can check out these steps to have this done.
- Start by opening the App Store. Here, you will need to enter the name of your carrier and download their official mobile app.
- Once the app has been downloaded, login using your registered credentials and then proceed to purchase a cellular plan for your iPad.
In this case, activation of your eSim would hardly take 5 minutes and once you receive a notification that your data plan is active, you can directly browse or surf the web without Wi-Fi.
Recommended Read: How to download music and videos on your iPhone and iPad
View or Change Cellular Data Settings on iPad Cellular Models
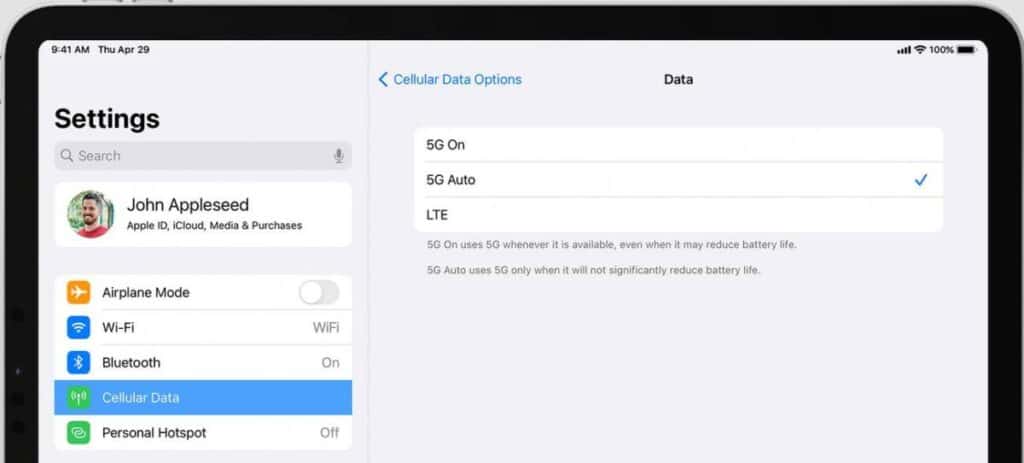
If you’re using the iPad cellular model, you are able to activate cellular data from within the Settings App. You can enable and disable cellular data on your iPad and even set which apps will use cellular data.
If your iPad is currently connected to a cellular network, then the network status icon will appear in the status bar. However, if you have cellular disabled but active on your Sim, you can enable it by opening the Settings App, navigate to Cellular and then enable the services.
From here, you can even add a new cellular data plan to your iPad, create or change your cellular account and even set cellular data based on data usage, battery life and performance of the iPad.
You can use any of these settings depending on your requirements:
- Reduce Cellular Usage - You can reduce your cellular data usage by enabling Low Data mode. This will pause any automatic update or background task when the device is not connected to WiFi.
- Enable/Disable Data Roaming - Data roaming lets you use your cellular data on the iPad but at a premium. You can disable this feature within the Settings App to avoid any roaming charges.
- Enable/Disable LTE - LTE allows pages to load faster, if this is off you would receive standard networking speeds that may be slower than WiFi.
- Set up Personal Hotspot - If you’re using cellular network on your iPad, you can create a personal hotspot so other devices can connect to the internet via your iPad. To do so, open the Settings app and tap on Cellular Data and finally enable Hotspot and Tethering.
- Set Cellular Data Use for Apps and Services - You can manually enable or disable cellular data for individual applications. You will have to open the Settings App, tap on Cellular Data and then manually turn off cellular data for each app.
How to Check your Cellular Data Usage on iPad
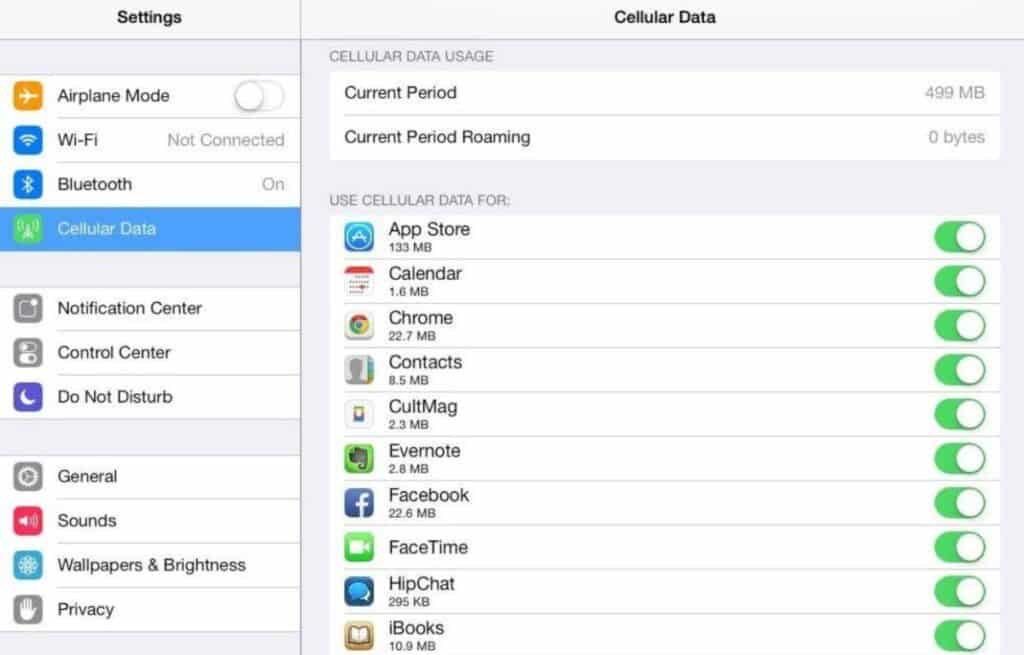
With your iPad, you’re able to check just how much cellular data has been utilized and how much is left in your account.
To check your cellular data usage, open the Settings App on your iPad and tap on Cellular Data. You will be able to view the data used during a particular period of time along with any data that might have been used while you were roaming.
This page lets you view the data consumption of individual apps and even lets you disable certain apps that you feel would be better off working on WiFi.
You can even reset the data usage stats by tapping on Reset Statistics from the Cellular Data page.
How to Transfer your Cellular Plan from one iPad to Another

You will be able to transfer your cellular plan from one iPad to another in a few simple steps. The method you follow depends on whether you use an eSim or have a regular physical sim in your iPad.
For those who have a Sim card
- Make sure both iPad's are switched off and with the help of the Sim removal tool, take out the sim card from your primary iPad and place it on the side.
- Proceed to use the sim removal tool and eject the second iPad's sim tray.
- Place the sim card you took out from your primary iPad and insert it into the second iPad's sim tray.
- Re-insert both the sim trays in their respective iPad's.
- Turn them on and wait for a couple of minutes for the network to get registered.
For those using an eSim
- Start by switching on your new iPad and open the Settings page.
- Navigate to Cellular Data and then tap on Setup Cellular Data.
- If your carrier permits transferring your cellular plan between two devices then you should find a Transfer button present on the screen, tap on it.
- If you do not have any Transfer button on the screen then it means that the carrier does not permit transfers and you will have to personally reach out to them and have the services activated.
Features of iPad with Cellular Access
iPad’s with WiFi + Cellular are not that far off from those WiFi only models. The only major difference is that with WiFi + Cellular, you’re able to stay connected to the internet even when there’s no WiFi network available.
Here are some of the features and capabilities of owning the iPad cellular:.
- You’re able to stay connected to the internet whenever you want, especially while traveling or heading out of station (check roaming charges if applicable)
- The setup is pretty easy and you can activate an eSim from within the iPad itself.
- You can browse the web, send emails, iMessages, access your social media accounts and even download files when you’re not connected to WiFi.
- Work becomes easier because you can collaborate with your peers while on the move.
- There are short term data plans available and you’re even allowed to purchase data packages based on your requirement.
- Cellular data can be added even when you’re on the move and you wouldn’t have to spend more than 5 minutes activating cellular mode on your iPad.
- Network is available in over 180 countries and regions.
- The latest iPad Pro models come with 5G capabilities that boost your network speed.
Install a nano-SIM in the Cellular iPad
With certain iPad cellular models, you’re able to install either an Apple SIM or a nano-SIM.
You will have to follow these steps in order to successfully install your nano-SIM:
- Start by locating the SIM tray on the side of the iPad. With the help of a SIM eject tool, gently insert it into the small hole of the SIM tray and press it inwards to eject the tray.

- Slowly remove the tray from the iPad so you don’t damage or bend it.
- Position the nano-SIM according to the grooves on the SIM tray.

- Reinsert the SIM tray into the iPad.
- If you have entered a security PIN for the SIM, type the code when prompted to use the nano-SIM.
iPad Wi-Fi + Cellular Models
Since the beginning, iPad’s have come with both WiFi and Cellular capabilities. Cellular variants are a bit expensive as compared to the iPad WiFi only models and they even cost more on the long run, considering you’re purchasing an additional data plan.
There are three kinds of Cellular iPads, those that support eSims (latest), those that support only Apple Sim cards and not eSims (2014-2018) and those that come with an Apple Sim embedded in the iPad (2016-2018).
eSim Card Apple iPad Models - Apple had switched to eSim on all their iPad models post 2019. This basically means that you can enable cellular data digitally, without having to purchase a physical Sim card. The reason why iPads with eSim cards are getting popular is because you can buy the iPad from anywhere and wouldn't have to rely only on a particular carrier to provide you with the data you need.
- 11” iPad Pro 2020
- 12.9” iPad Pro 2020
- iPad Air (4th gen)
- iPad (8th gen)
- iPad Mini (5th gen)
Embedded Apple Sim iPad Models - iPad cellular variants that come with an embedded Apple Sim card make it easy to set up and switch between carriers. Unlike those models that require a physical sim, with embedded Apple sims you’re able to choose a particular plan and activate it on your iPad. If you’re unhappy with the plan you had selected, you can always opt out and request the service of any other carrier.
- 9.7” iPad Pro
- 10.5” iPad Pro
- 12.9” iPad Pro (2nd gen)
Apple Sim Card iPad Models - iPad models that come with an Apple Sim will let you physically place a Sim card in the iPad via the Sim card tray. This is a great alternative especially if you’re traveling to another country that doesn't support your primary network carrier. Here, you’d have to pick-up a nano-SIM in the country you’re visiting and insert that into the iPad.
- 12.9” iPad Pro (1st gen)
- iPad Air 2
- iPad (6th gen)
- iPad (5th gen)
- iPad Mini 4
- iPad Mini 3
Do You Really Need an iPad with WiFi and Cellular?
While paying an additional $130 - $150 for the cellular variant might not seem like much, there are many users who would opt out from this and resort to buying the WiFi only models.
Owning a cellular variant of the iPad proves beneficial only if you don’t have any other means of connecting to the internet.
So, if you have an iPhone that you can use as a cellular hotspot, then you wouldn’t have to opt for the cellular variant of the iPad. Simply tether your iPhone along with your iPad and you will have uninterrupted access to the internet.
This also has a drawback, your iPhone’s battery will drain faster than before, so you would have to charge the iPhone regularly which can actually damage the battery.
Cellular models of the iPad offer GPS capabilities as well, so you can use the iPad as a navigator and if there’s decent enough network coverage in the area, you wouldn’t have to worry about finding a WiFi hotspot of having to tether your iPhone to the iPad for it to work.
As with any device that relies on a cellular network connection, you will have to pay a monthly premium for your iPad’s cellular data plan. These plans are a la carte which means that you can select a plan depending on the type of use. You can even cancel your plan without any cancellation penalty.
One of the best things about the cellular iPad is that if you’re running a smartphone that offers data sharing, then you can add your iPad to that plan and pay the monthly fee in one go for both the iPad and your smartphone.
FAQ's
Is it worth getting iPad with cellular?
How does cellular on iPad work?
Is there any monthly fee for using cellular on iPad?
Can you make phone calls on a cellular iPad?
How do I check if my iPad has cellular?
Takeaway
There you have it, everything you need to know about how the iPad cellular works. This article is a guide to everything you need to know about cellular data on the iPad and how you can activate and use your Apple SIM or eSim.
While it's good to own an iPad with GPS capabilities and network connectivity, it's not always ideal. You can still tether your iPhone or any other smartphone with an iPad and still be able to access the internet when you're in a location where there's no Wi-Fi.
I hope this helped and you were able to successfully set up and use your WiFi + Cellular iPad.
Also Read:


Leave a comment
This site is protected by reCAPTCHA and the Google Privacy Policy and Terms of Service apply.